

A complete sweep through the platform
More than 20 sections, more than 30 types of interactive event, initial viewpoint settings, multilingual support, web and headset publishing, statistics. Click a section below to jump straight to it.
Also covered: AI tools (content search, analysis and rewriting), Story Map, location statistics, transparency mask, new transitions, and a preview of Mixed Reality (beta).
Who this guide is for
This guide presents the functions of the easystory360 platform and their uses: what each building block is for, in which real-world situations to use it, and what it changes for the visitors of your stories. It is aimed at creators, project managers and decision-makers who want to understand what the platform can do.
It deliberately describes neither the screens nor the settings: to put a function to work, each section links to the matching page of the easystory360 wiki, which documents the platform screen by screen, screenshots included.
1. Getting started and interface structure
easystory360 runs in a recent web browser, with nothing to install. An account is created with an email address, or through a Google, Apple or Microsoftaccount you already own. The working interface is available in several languages.
The platform is organised into broad areas that follow the life of a project: creation (the media library, the stories and their editor), publishing, management of the headset fleet and of users, audience reports, templates for a faster start, and help. A guidance session with the team can also be booked directly from the application.
How to do it: How the interface is laid out.
2. Library (CREATION → Library)
The library centralises all the media feeding your stories: 360° images and videos, audio, 3D objects, PDF documents, geographic data. Default content provided by the platform lets you start without raw material of your own.
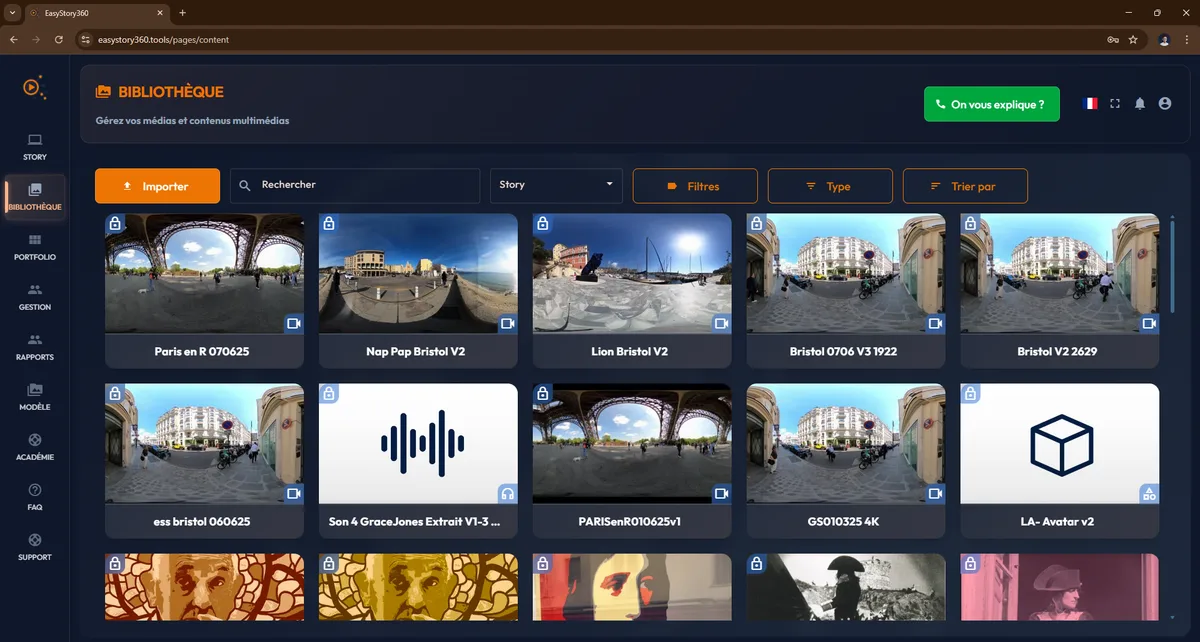
Everything is designed to find a media file fast, even in a large collection: filters, sorting, two display modes, and a spherical preview of 360° images and videos, so you check the real rendering before even creating the scene. You can also spot the media no story uses, to clean up; conversely, a media file in use is flagged, and deleting it triggers an explicit warning.
The AI tools speed up cataloguing: a description and keywords generated from the visual content of an image, and the transcription of spoken audio into text. AI search builds on them: you find an image by what it shows, even if the file has a cryptic name.
Then there is the question of format. The right resolution and encoding cannot be decided in the abstract: they depend on the headset that will play the story. We publish one guide per model, Meta Quest, Pico, Vive Flow, with the settings that give the best rendering without bloating the files: the academy's hardware guides.
How to do it: Importing media and The library's AI tools.
3. Stories (STORY menu)
A story is a complete immersive experience: 360° scenes connected to one another by interactive events. Creation is guided: you name the story, pick the 360° media, and the platform creates one scene per media file.
Day to day, a story can be tested in the browser at any time, duplicated to experiment without risk, and organised with tags. A story received from another user is accepted, then edited like your own.
How to do it: Creating a story and Story card actions.
4. The story and scene editor
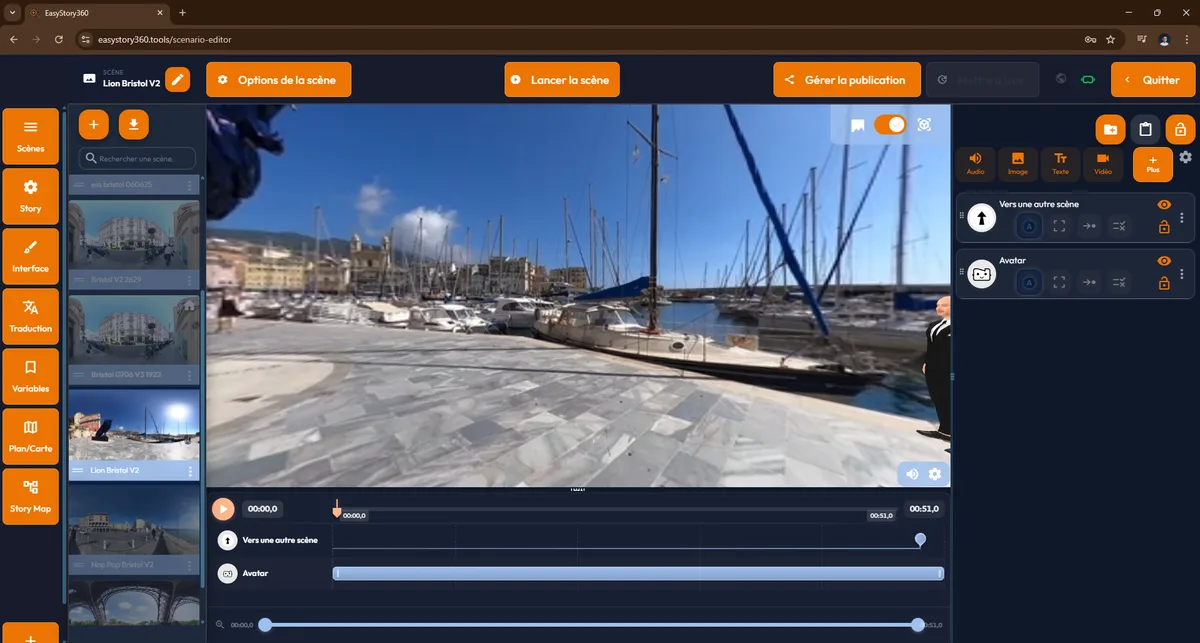
Opening a story leads to the editor, the central workbench: the scenes on one side, the current scene in the middle, and the settings that apply to the whole story (identity, player interface, translation, variables, customisation). This is where you define the starting scene and the ending scenes, reorder scenes, duplicate them, or import one from another story.
The Story Map draws the plan of the story: every scene is a node, and the links between scenes can be read at a glance, including those that depend on a condition. Indispensable as soon as a route branches out: escape games, branching training scenarios.
The error check, finally, flags blocking problems (missing media, incomplete quiz, empty link) and takes you straight to the spot to fix. It is not a mere warning: as long as an error remains, the story cannot go live, neither on the web nor on headsets. Better to deal with them as you go.
How to do it: The editor and its panels and The story map.
5. 2D view vs 360°/3D view: two ways of working in the editor
The editor offers two ways of looking at a scene. Flat, the 360° sphere unfolded like a world map: the mode for precise editing, where you place the events and set the initial viewpoint. In 360°, the scene appears as the visitor will see it: the mode for checking, where you verify the real rendering, fine-tune the elements and preview the 3D objects, which are invisible in the flat view.
The point to remember: the current mode determines which tools are visible. If a control seems to be missing, switching views is often the answer.
How to do it: 2D view and 360 view: two working modes.
6. Setting the initial viewpoint (the most frequently asked question)
The initial viewpoint determines what the visitor is looking at when a scene opens. It is the first staging tool: point the gaze at what matters from the very first second, rather than leaving the visitor to search.
It is set in the flat view and checked immediately in the 360° view: the scene opens facing the chosen point. If you also restrict how far the visitor can turn their gaze, make sure the initial viewpoint stays within the allowed limits.
How to do it: The initial point of view.
7. Scene options (gear icon on a scene)
Every scene carries its own settings: its title, its duration, looped playback for videos, a progress bar shown to the visitor, an ambient sound of its own, the limit beyond which the visitor can no longer turn their gaze and, depending on your plan, a 3D object to observe in the scene. You can also replace a scene's media without losing the events already placed, as long as you stay with a 360° media file of the same type.
One point conditions many decisions: a photo scene lasts zero seconds by default, which means unlimited time. Without a duration, nothing time-related is possible in the scene: no automatic move to the next scene, no time-based mechanic. Giving the scene a duration is therefore the prerequisite for any sequencing logic.
Note for long-standing users: the old option that automatically sent the visitor to a destination scene when the time ran out no longer exists; sequencing now goes through an automatic link placed at the end of the scene.
How to do it: Scene options, tab by tab and The prerequisite: give the scene some time.
8. Interactive events (more than 30 types)
Events (also called hotspots or points of interest) are the interactive elements placed in the 360° scene: they are what turns a passive visit into an experience. More than thirty types, in six families:
- Media: display an image, a slideshow, a video, plain or formatted text, play a sound. The backbone of mediation: bring content up at the moment the visitor asks for it.
- Quiz: instructions, multiple-choice questions, open answers, hidden objects to spot in the scene, a debriefing screen with a score, bonus and penalty points. Everything needed to assess, score and gamify; hidden objects work well for observation tests (spotting a hazard, a missing piece of equipment).
- Links: send the visitor to another scene, another story, a media file or a web page; group several events under a single point to keep the scene readable; display the story's floor plan; mark an arrival point in a scene, so the visitor arrives facing the right direction and the route keeps its visual continuity.
- 3D: a 3D object the visitor can manipulate, an avatar embodying a guide or a counterpart in the scene.
- Masks: extend the clickable area to a large surface of the scene, or hide and reveal part of the image.
- Advanced: collect data through a form, trigger an action by voice, let the visitor switch language, open the headset settings, change a variable, end the experience, rotate the view automatically, or pause the background video for the time of an interaction.
Visuals can be worked on too: a media file can be cut out by a transparency mask (free shapes, cut-out logos), a video can stay frozen until a condition triggers it, and a green-screen subject can receive a ground shadow to sit more convincingly in the scene.
Every event triggers on click, automatically at a point in the scene, or under a condition. Its appearance is customisable (icon, animation, title visible or not), AI writing aids correct and rephrase your texts, and moves from one scene to the next offer several transitions, including one designed for comfort in VR.
Two limits steer the choices: text entry (open answers, forms) is reserved for web publishing, as standalone headsets have no keyboard; voice recognition, on the other hand, is more at home on a headset, where the microphone is always available.
How to do it: The 30 events, category by category and Settings shared by all events.
9. Trigger variables (conditional logic)
Variables are the story's memory: they remember what the visitor has done, so the rest can adapt. A variable can be a true-or-false state, a number, a choice among predefined values, or a clock that starts and stops, for timed challenges and countdowns.
Combined with event conditions (appear only if a given question was answered correctly, if a given event was opened, if a given score was reached), they open up branching scenarios: escape games, adaptive routes, training with multiple paths.
How to do it: Variables: the story's memory and Conditions: reserving an event for a situation.
10. Story options and Customization (template)
Dressing a story plays on two registers. Identity first: title and description, colours, welcome message, the thumbnail shown when sharing, an ambient sound played throughout the experience, automatic start or not.
The player's interface next, what the visitor sees around the scene: your logo, the image masking the tripod foot at the bottom of the sphere (the nadir), a scene list for free navigation, a floor plan with clickable markers leading to the scenes (museum visit, industrial site), sounds played when points of interest open, and the aiming cursor in the headset. Two visual styles exist, one sober and professional, the other illustrated and playful.
The result for the visitor: an experience in your colours, from the welcome screen to the last scene.
How to do it: Story options: identity, colours, startup and The player's interface: logo, nadir, scene list.
11. Multilingual (Translation button)
The same story can exist in several languages. All texts can be translated: titles, messages, questions, answers, feedback. Audio commentary can receive one version per language. The visitor picks their language inside the experience itself, including in the headset.
Languages are attached to your account and become available for all your stories.
How to do it: Multilingual: translating texts and audio.
Mixed Reality Beta
Alongside 360° stories, easystory360 offers a story type in Mixed Reality: an experience without a 360 scene, where the content (videos, 3D objects, events) is placed directly in the user's real room, seen in passthrough on compatible headsets. The type is chosen when the story is created.
You describe the real space (dimensions, doors and windows, obstacles and furniture), then zones trigger events when the user physically steps into them. 360 videos can appear there as a bubble, which you dip your head into, or as a portal open onto the 360 universe.
A beta feature: the interface is still evolving and access depends on your plan. Contact the explorations360 team to try it.
How to do it: the easystory360 wiki.
12. Publishing (PUBLISHING → Publication)
A story is broadcast on two channels: the web, through a public address that can be shared or embedded in your site, and your headsets, directly or through an easybox360. On the web side, access is under control: open to everyone, protected by a password, or reserved for accounts you manage. A short link and a quick entry code make it easier to share the story and load it on a display device.
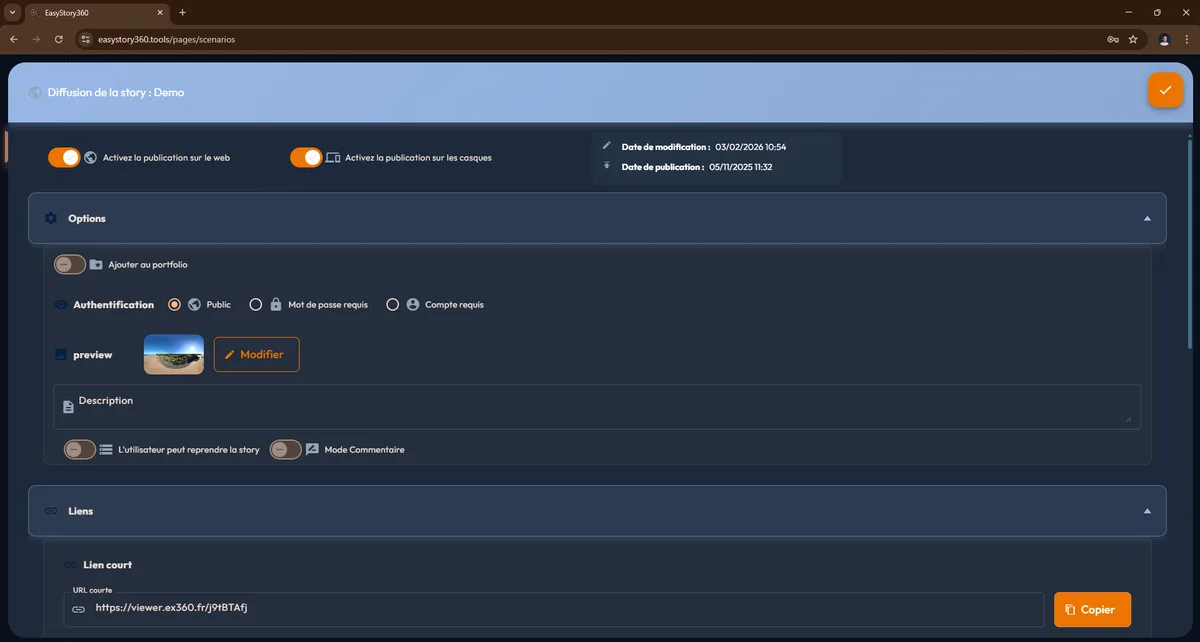
The project review mode turns the story into a validation space: reviewers annotate the scenes, leave positioned comments, and reply to each other in threads. A good way to have a story validated by a client or a teaching team before final publication, then switch back to regular broadcasting.
A published story keeps living: you push a new version whenever you decide. The update stays blocked as long as the story contains errors, and some choices made at publication time can no longer be changed without unpublishing.
For training, a story can also be exported as a SCORM module to drop into your LMS, depending on your plan.
How to do it: Publishing a story: web and headsets, Updating and stopping the broadcast and SCORM export for your training platform.
13. My Devices (MANAGEMENT → My Devices)
Three families of devices can join your account: VR headsets, tablets used as viewing screens (museum walkabouts, company receptions), and piloting tablets with which a facilitator controls live what the headsets are showing. Pairing relies on a code displayed by the easyviewer360 application on the device itself, to be copied into the platform.
Once the fleet is paired, everything is monitored remotely: each device's status, battery, available space, installed content, last connection. Remote actions (restart, shut down, locate, install the content) save you from handling every headset. Content can synchronise automatically, and a device can run on its own, be piloted by a control tablet, or be locked onto its content.
The number of devices you can pair depends on your plan; the platform warns you when the limit is reached.
How to do it: Pairing and managing headsets.
14. My boxes (MANAGEMENT → My boxes)
A box groups headsets and the content they receive: one box for the training room, another for the trade show, each with its home story and its activity period, handy for short-term rentals. Content is assigned to it through groups prepared in advance (see the next section).
Kiosk mode turns the setup into a self-service station: between two users, a waiting video plays to draw passers-by. It is the setting for unattended installations: reception hall, trade show, museum, point of sale.
How to do it: Boxes, kiosk mode and the headset home.
15. Portfolio (Content organisation)
Two functions organise how your content is made available. Content groups, first: bundles of stories assigned to one or more boxes, to send the same content to a whole fleet of headsets without attaching it device by device.
The portfolio, next: your account's public showcase. A single, shareable page presents the published stories of your choice; one click opens the story. The page can be customised to your image and reserved with a password.
How to do it: Boxes, kiosk mode and the headset home and The portfolio: your public showcase.
16. Interface (the « Home » page)
The headset welcome environment can be customised: a 360° panorama wrapping the visitor, a presentation visual, an ambient sound. The visitor thus waits inside your universe before the first story even starts, and a 3D preview shows the result as it will appear in the headset.
How to do it: Boxes, kiosk mode and the headset home.
17. My users (MANAGEMENT → My users)
For stories with restricted access, you create guest accounts: each person receives their credentials and their enrolments, story by story, with a validity period and a number of attempts. You can also share your media library with a guest.
Monitoring comes with it: last connection, attempts used, best score when the story includes a quiz. It is the tool for tracking a training cohort, and the list can be exported.
How to do it: Users and their rights.
18. My subscription (MANAGEMENT → My subscription)
Your subscription plan governs several capabilities: storage space, the number of devices you can pair, and advanced options such as the authentication of public links or SCORM export. The rule is constant: when an option is not included in your plan, the interface tells you at the very spot where you try to use it.
There are four tiers, billed monthly or yearly, yearly being the better deal. What changes from one tier to the next: storage space, and how many stories you can publish to the web and to headsets.
| Plan | Storage | Web stories | VR headsets | Price (monthly, excl. tax) |
|---|---|---|---|---|
| Free | 1 GB | 1 | 1 | €0 |
| Starter | 15 GB | 4 | 4 | €25 |
| Starter+ | 90 GB | 10 | 10 | €70 |
| Business | 250 GB | Unlimited | Unlimited | €180 |
Creating stories is unlimited on every plan: only publishing, web or headsets, is capped. For a multi-site rollout, integration with your training platform or advanced branding, a bespoke tier can be negotiated with the team.
How to do it: Where to read your account's limits.
19. Statistics (REPORTING → Statistics)
Statistics measure the audience of your published stories: number of views over time, types of devices used (computer, mobile, tablet, headset), average viewing time, and the scene-by-scene detail, which shows where attention settles and where visitors drop off.
Location completes the picture: where the viewers come from, by country and city, and in which language they watch. Precious for measuring the reach of a multilingual web broadcast.
How to do it: Audience statistics.
20. Forms (REPORTING → Forms)
The answers collected by the forms placed in your stories all land in the same place: each submission is timestamped, attached to its story and its scene, with the type of device used. Everything can be filtered, marked as processed for follow-up, and exported to a spreadsheet.
Typical uses: capturing contacts on an immersive demo, on-the-spot evaluation at the end of a training session, satisfaction survey after a visit.
How to do it: Form answers.
21. Profile and account
Your account area gathers your personal information, the working languages used by multilingual stories, the tracking of your storage space and the activation of the AI features. Deleting the account remains possible, with confirmation.
How to do it: the easystory360 wiki.
22. Help
Help goes through two built-in channels: documentation and a contact form reaching the team directly. For more complex needs, the explorations360 team steps in with personalised guidance.
How to do it: the easystory360 wiki.
Note: web vs standalone headset compatibility
A story does not behave quite the same way on both channels. Seven events only work on one side, and the platform says so when you open their settings panel: opening a web page, rich text, the event group, the form and automatic camera rotation are web only; headset settings are headset only. On top of that come physical limits, which nothing flags:
- open answers and forms require a keyboard: keep them for web publishing;
- voice recognition is more at home on a headset, where the microphone is always available, than on the web, where it depends on browser permissions;
- headset settings have no effect on the web.
Good practice: if your story has to run on both media, make your text entry events conditional, or plan two versions of the story, one designed for the web, the other for the headset.
Going further
This guide covers standard usage. For bespoke setups (integration with an LMS, advanced branding, support with creation), the explorations360 team offers dedicated services. The platform evolves regularly: refer to the easystory360 wiki for the screen-by-screen detail and the latest features.